Thursday 11 December 2014

A bit about me!

Let me tell you a bit about myself.

 
I'm a self taught artist/crafter living Edinburgh with a lovely husband and two kitties!
I've always had a love of making things. I was born in 1973 and grew up in the highlands of Scotland. Since I was a 'wee lassie' I was always cutting things out, making clothes for my care bears, (remember them?!) and I knew I had a love for colour and nature.


My parents split up in my early teen years so with a change of school and a change of life, I left school with no qualifications to speak of really. But I got a job in my grandfathers butchers shop making pies! I've been fortunate to always have been in work. I also worked in a kilt making factory in Inverness which was really fun.
Me at 18 years old in Hector Russell kilt makers in Inverness.


I would say my creative journey flourished when I moved to the Orkney Islands. I got a job working for Jane Glue, a local water-colour artist. She had a lovely wee shop and gallery that sold her paintings, prints, cards and art materials. I learnt a lot from Jane in the way she ran her business. It was also up in Orkney where I first started to do craft fairs. I started out making framed boxes with balsa wood. I then went on to glass painting which I still love to do. I then went on to making jewellery with wire and beads then making my own beads with polymer clay. I've also done some card making in the past too. You know what they say, 'Jack of all trades, master of none!'. I'm like a magpie with my interest of craft.
One of Jane Glues watercolours.


Since then I have done many demonstrations and have wrote tutorials for craft magazines over the years. I even came first place in a polymer clay completion with crafts beautiful magazine! I never win anything so I was so chuffed!


Within the past number of years I got married, moved from Orkney to Edinburgh, moved to Forres in the Moray area and then moved back down to Edinburgh. I've loved meeting other makers with so much talent which has inspired me so much.


I think my inspirations are art deco and art nouveau. I've had the privilege to go to Prague and see works of Alphonse Mucha. He must be my favourite. I also love Van Gogh and the use of colour he uses. I think my next trip will be to Barcelona to see Gaudis work.

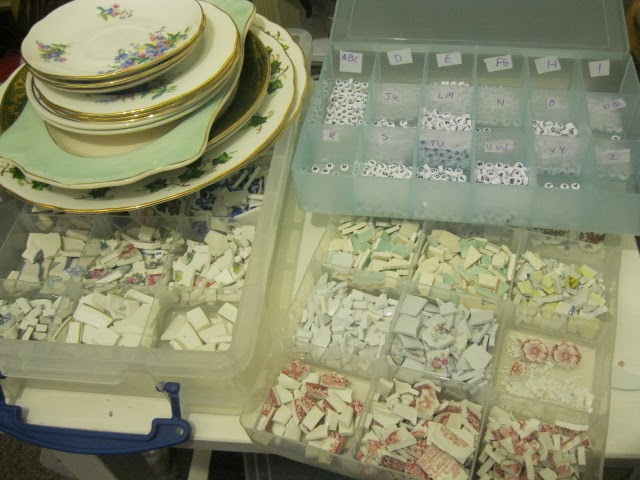
I lost my craft mojo and decided to have a complete change. Within the past year I had a massive de-clutter and decided to stick with the one craft. Simplify my life! I have found a new passion for mosaics! I use mostly vintage plates and cups that are found in thrift stores or other exciting places. I try my best to be sympathetic to the item and get the best of reusing it. I try not to waste anything. I love the colours in vintage ceramics which gives my mosaics a fresh and clean look. I work from a spare room at home. It limits me to the projects I can do because of the space. I have only being doing mosaics from late 2013 so I still have a lot to learn but I am enjoying the process.
 

I hope you enjoy my story.

All the best.

Carol :D
 
***********************************************************
See my lovely mosaics for sale by clicking HERE!
 
Also find me on facebook and become a fan!
 
***********************************************************
 

Saturday 6 December 2014

How I make my mosaics and are they worth it. - Part 2

Hello to you all. Well its been along time since my last post! Since then I have moved back down to Edinburgh and have been involved with a lot of craft fairs here. I will tell you what I've been up to another time but I want to finish this post! Sorry its taken me so long!


After filling in the gaps with the glue I am ready to grout. I must say its the least of my favourite bits to do. It takes ages but with a small item its not to bad.
 

This but gets a bit messy and I use latex gloves for it. You can get a pack cheaply from most discount or pound stores. I use them because my fingers were getting cut up and the grout was drying my hands out like sandpaper!
 

I clean up the grout and leave it to dry a but before I use a toothbrush to clean of any excess grout and it picks up the features of any beads I have put it. I'm a bit O.C.D. about this.


Once its dry I paint the back with normal emulsion paint since it will be an indoor item. I just give it the one coat because the style is a bit shabby chic.


I then choose a ribbon which will bring the best out of the item.


And then I buff it down to make it shine and there you have it!!
 
So how much did it cost to make? Well this one was a tad more pricey because the butterfly shape was about a pound each which included the price of the postage.
 
***********************************
 
So this is the interesting part. With all the little things like the tiles, glue, beads, ribbon, wooden blanks and the time to source and buy these things, many crafters DONT make their costs if you think about it. We are encouraged to cost everything, give yourself minimum wage, then double it and that should be what you should charge. So I should be charging about £18 for this wee butterfly but I'm selling it for £7 on etsy.
 
I think the moral of the story is, PLEASE BUY HANDMADE! As for me I love what I make. A bit of my heart goes into my creations. We are not mass producers and you are getting something special with a story behind it. I hope many crafters can relate to this and I hope you can take the time to comment because I would like to hear what you think.
 
All the best until next time!!
 

Wee butterfly on etsy. Click here to view.


Wednesday 4 December 2013

How I make my mosaics and are they worth it. - Part 1

Hello and welcome to my blog. I can't believe how long it was since my last post! Well I've come along way since I've posted last. I have loved polymer clay but have found a new love! I've always loved mosaics in one way or another but I have found a way to combine a new gift ideas with up-cycling broken plates to make something new for your home.

Also with a lot of discussion on handmade and how to cost your work, I thought I would write a post on the process of how I make a small item and how I cost it. You will find it interesting and maybe look again at why handmade products are a wee bit more expensive than mass produced things.


First I source some vintage plates. You can pick them up from charity shops and other places. You can see I have quite a selection that I have cut up using my tile nippers and a hammer! I also use letter, glass and other beads to create texture and I can create some nice sentimental sayings too.


I also Have some good bits of MDF wood which I was given which keeps costs down. I use my dads drill to make holes to be able to hang them up. I also sand them down and round off the corners.


You can get all kinds of shapes of wood blanks. I like using the heart ones and I got a few butterfly ones. You can pick them up from 50p upwards. The butterflies cost me about £1 each. Most items come with the hole drilled in them.


I've used my tile knippers to cut out focal flowers for my mosaic. I mostly use the no nails glue to stick things on. I get the tubes out of the £1 shop because I've found it to be the best value for money with other shops selling the same product for double the price!


Next I add beads to the edge of the butterfly then leave this to dry before I fill in with other mosaic pieces.


So so far I would say its cost me £1 for the butterfly itself which I got online. The difficult thing is how do you calculate the cost of the other parts? Say maybe another 40p. Then take into factor the time it cost to surf the net, source the items and your postage costs. That is part of the fun in making something though but you get the picture.

In my next post I will give you the next steps.

You can find me on etsy by clicking here. You will find lots of my lovely things for sale.
Also find me on facebook by clicking here. Become a fan and like my page to see where I will be and what I'm up to.

♥Hope you enjoyed the post. See you soon!♥

Friday 26 August 2011

Folksy Friday - The pet shop!

Do you ever find that sometimes the stress of crafting for a living can get to you? Ive been doing this for 3 years now. With sales going down and shops not paying up on time I felt I could do with something that was a bit more secure. It can be tough working for yourself at times. You have to be self motivated and organized which I think we all find it hard to do!

So I thought that I would look for a wee part time job that could give me a regular income and then I can do my crafting as a hobby again. In my village I saw an advert in a shop window of a pet shop. The hours looked right so I put my CV in and hoped for the best. I've always wanted to work in a pet shop. I'm forever going in them just to say 'hi' to the wee animals. (No I'm not mad. I bet you have done the same thing!!) So I was so chuffed that I got a call back and I went for an interview the next day. But I got the text today saying I hadn't got the job. Boohoo!! Oh well, I will keep trying so my folksy Friday is my next thing to it.I hope you like it♥

1:Quernus Crafts with wee tan mouse with green apple
2:Carole's glass with stained glass angel fish sun catcher
3:Mary Elliott with cute Guinea pig ring
4:Handmade by Kitty Clark with homespun bunny
5:Hoot ceramics with ceramic birds
6:The other mousie with rare Tibetan sneezing hamsters

I hope you enjoy my selection and please feel free to give a comment. Also you can have a browse in my folksy shop by following the link.Carols crafts on folksy
♥♥♥♥♥♥♥♥♥♥♥♥♥♥♥♥♥♥♥♥♥♥♥♥♥♥♥♥♥♥♥♥♥♥♥♥♥♥♥♥♥♥♥

Saturday 20 August 2011

Alcohol inks and polymer clay.

I wanted to share one of my favourite techniques with you. It give a fantastic effect that I just cant get enough of just now. What I use here is black polymer clay, alcohol inks and a sheet of silver leaf. I had run out of the gold leaf but I had gold alcohol ink so that did fine. The inks can be quite expensive but they do last a long time. Make sure you store them in a cool place.

I firstly conditioned some black fimo through my pasta machine at the thickest setting and gently placed a piece of silver leaf on it being carefull not to break it. You can use silver leaf too. Then a splogged some gold alcohol ink on the top and took a wee sponge and dabbed it all over the silver leaf until it was covered.


Next I dropped some blue and purple ink on in a random patten letting the colours run into one another.


Next I took a wee sponge and dabbed the colours to merge them a bit more and then I let it dry a bit. The alcohol in the ink eventually evaporates.


I then dropped a third colour of a blue just to give it another dimention. I conditioned another piece of black clay at the thickest setting then I placed the inked clay on top and cut out shapes ready to use to make beads.


I peirced the bead before baking. When cured at the manufactors recomendation, I varnished the top of my beads them made a lovely bracelet from it! I love these colours together so I think I may keep this one.

 
I think when you see how easy this is you can find alsorts of colour combinations. Remember to think of the colour wheel and use colours that will complement one another. Its good to think carefully about this because it saves you from getting a muddy pallet and ruining your clay.


I hope you have enjoyed this blog and have found it usefull. Below are some usefull links on where you can find some materials for this project. Have fun!♥


Please feel free to leave a comment. All the best. Carol♥

Tuesday 9 August 2011

New tutorial! - Polymer clay flower pendant and beads.

Many who have polymer clay are not sure what to do with it. They have maybe made some marble type beads but can't think how to get complex patterns. There are many tutorials out there on-line and on you tube. That's where I started to learn myself the basics of polymer clay caning. I was very grateful that the information was out there. So as I progressed and made my jewellery many others expressed interest in learning too. They were to far to go to my classes so I decided to write my own tutorials to send over the email in PDF form so they can do it at home.

My first tutorial was Carols Celtic Cane. It taught you what you need to make your cane and also how to use it when made. It shows how to make pillow beads and how to make what I call a 'fimo slab' which you can use to make shapes from or cover items with.

This tutorial is still available in my folksy shop.
 Carols Celtic Cane Polymer Clay Tutorial - Folksy shop

So my latest tutorial is a polymer clay flower pendant and beads. In this tutorial I have written instructions on how to make your own petal cane and how to make it into a lovely pendant. Also included is how to make a flower cane and make your own beads with it. Its perfect for those who know the basics of polymer clay and would like to know more . It includes 15 PDF pages 47 colour pictures.

 This new tutorial is available in my folksy shop with hopefully more tutorials coming out soon.
Polymer clay flower pendant and bead tutorial PDF- Folksy shop
Please feel free to leave a comment.
All the best.
Carolxxx

Thursday 28 July 2011

♥I love colour!! - Folksy Friday!♥

Well my next folksy Friday is a colourful one. I love colour especially the rainbow spectrum. Ive found some lovely finds on folksy with this theme. There was so much to chose from it was difficult to make up my mind so I have 10 to choose from. Its been such a rubbish summer so far so this might cheer you up. Enjoy ♥

1:Rainbow lavender bag by Vintage Patchworker  http://www.folksy.com/items/1636301
2:Rainbow silver plated bracelet by Pink Chihuahua Kisses http://www.folksy.com/items/1971761
3:Pencil hair grip by Funky Jewellery http://www.folksy.com/items/1639085
4:Rainbow flower buttons by Lilley http://www.folksy.com/items/1537913
5:Rainbow star stained glass panel by Diomo Glass http://www.folksy.com/items/1897725
6:Rainbow tutu by Strawberry Annies http://www.folksy.com/items/1600729-Rainbow-Tutu-
8:Glass rainbow windchimes by Abundant Glass http://www.folksy.com/items/1972353
9:Rainbow mirror by Clair Seely Glass Design http://www.folksy.com/items/1933393-Rainbow-mirror
10:Pocket rainbow-Baby felt plush rainbow by The Rainbow Room http://www.folksy.com/items/1903913

♥And here if a few of my own rainbow things.♥

1:Funky chunky stacker bead polymer clay bracelet http://www.folksy.com/items/1597289-Funky-Chuncky-Stacker-Bead-Polymer-Clay-Bracelet-
2:Polymer clay rainbow charms http://www.folksy.com/items/1911741-Polymer-Clay-Rainbow-Bead-Charms-?shop=yes
3:Rainbow ball polymer clay bag charm http://www.folksy.com/items/1893813-Rainbow-Ball-Polymer-Clay-Bag-Charm-?shop=yes
4:Rainbow butterfly polymer clay necklace http://www.folksy.com/items/1929405-Rainbow-Butterfly-Polymer-Clay-Butterfly-Necklace-

♥I hope you like the selection and please feel free to leave a comment. All the best!♥
♥♥♥♥♥♥♥♥♥♥♥♥♥♥♥♥♥♥♥♥♥♥♥♥♥♥♥♥♥♥♥♥